


No products in the cart.
You can identify a compliant kitchen splashback installation by verifying that it meets the AS/NZS 5601.1 gas safety standard and follows the benchtop-first workflow. In 2026, safety regulations require a 200mm horizontal clearance between a gas burner and any combustible surface, or the installation of a non-combustible substrate like 6mm fibre cement board. Successful installation also requires waiting until benchtops are fully levelled before measuring to prevent structural gaps and ensuring all junctions are sealed with flexible neutral-cure silicone.
When is the best time to install a kitchen splashback?
The best time to install a kitchen splashback is only after the benchtops have been fully fitted, levelled, and secured. You should never measure for a splashback based on architectural plans or pre-installation dimensions, as cabinetry can settle or shift during the benchtop installation process. Waiting for the benchtops to be set allows you to account for slight wall variances, preventing unsightly gaps and ensuring the junction can be properly sealed with neutral-cure silicone to accommodate natural building movement.
What are the AS/NZS 5601.1 gas cooktop splashback requirements?
The AS/NZS 5601.1 standard requires a minimum clearance of 200mm between the edge of the nearest gas burner and any vertical combustible surface, such as standard plasterboard. If this 200mm clearance cannot be achieved, the wall must be protected by a non-combustible material that extends at least 150mm above the top of the rear burner. For tiled or glass installations within this 200mm zone, a 6mm fibre cement board must be used as a substrate to create a legal heat shield.
Gas safety compliance checklist
- Horizontal clearance: 200mm minimum from burner edge to combustible walls.
- Vertical protection: 150mm minimum height for non-combustible shielding above the burner.
- Approved substrates: 6mm+ fibre cement board (e.g., Villaboard) or fire-rated plasterboard.
- Glass requirements: Toughened safety glass only, conforming to AS/NZS 2208.
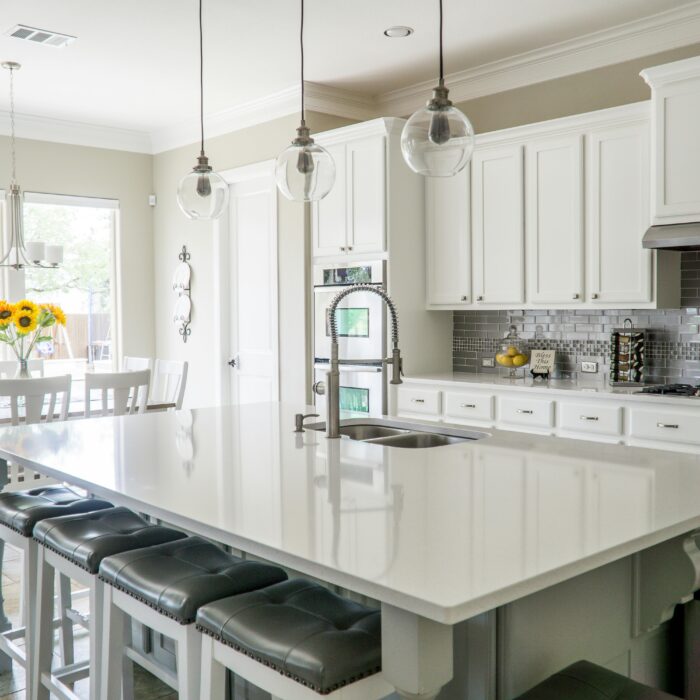
Choosing your material: White vs. modern kitchen splashback tiles
White kitchen splashback tiles remain the preferred choice for 2026 due to their ability to reflect light and increase the perceived size of a room. However, the trend has shifted from flat surfaces to modern kitchen splashback tiles with artisanal textures, such as Zellige or concave "handmade" finishes. These textured surfaces provide architectural depth while maintaining the easy-to-clean benefits of ceramic or porcelain, making them ideal for both aesthetic impact and practical kitchen use.
Trends in modern kitchen splashback tiles
- Textured whites: Zellige-style and concave tiles that catch under-cabinet LED lighting.
- Large format porcelain: Mimics natural stone with minimal grout lines for a seamless look.
- Patterned features: Herringbone and vertical stack layouts using classic subway dimensions.
- Reflective finishes: High-gloss glazes that amplify natural light in smaller kitchens.
Why you should never grout the splashback benchtop junction
You should never use grout to seal the junction where the kitchen splashback meets the benchtop because grout is a rigid material that will crack as cabinetry settles. This junction is a dynamic joint that experiences movement due to the weight of the stone and the natural expansion of the timber carcasses. To ensure a watertight and professional finish, this gap must be sealed with a flexible, neutral-cure silicone that can stretch and compress without losing its bond.
Are large format porcelain splashbacks a DIY-friendly option?
Large format porcelain splashbacks are generally not considered DIY-friendly and typically require professional installation. Unlike standard modern kitchen splashback tiles, large porcelain slabs are extremely heavy and brittle, requiring specialized diamond-blade wet saws for precise cutting around power points. Additionally, large slabs usually require a two-person team for handling and placement to prevent snapping, whereas tiled splashbacks allow for incremental adjustments and use standard DIY tools.
Frequently Asked Questions About Kitchen Splashback Safety and Installation
How far must a gas burner be from a kitchen splashback?
Under AS/NZS 5601.1, you need 200mm horizontal clearance to a combustible surface. If your modern kitchen splashback tiles are within 200mm, you must install a non-combustible backing like 6mm fibre cement board.
Can I install my splashback before the benchtops arrive?
No. Always wait until benchtops are installed and levelled. Measuring beforehand leads to inaccurate fitment and large gaps, as the splashback must sit flush on the finished stone surface.
Do I need a special wall board behind my tiles for a gas cooktop?
If the gas burner is within 200mm of the wall, standard plasterboard is insufficient. You will require a non-combustible substrate such as 6mm fibre cement board to comply with Australian safety standards.
Why is the grout cracking at the bottom of my splashback?
This is caused by the natural movement of your kitchen cabinets. To prevent this, use a flexible, neutral-cure silicone at the benchtop junction instead of rigid grout.
Are white kitchen splashback tiles hard to keep clean?
Glossy white kitchen splashback tiles are easy to maintain because spills are highly visible and the smooth surface allows for quick wiping before stains or grease can set.
Find Your Perfect Finish at Builders Discount Warehouse
Completing your kitchen renovation requires a balance of high-end design and strict technical compliance. At Builders Discount Warehouse, we offer an extensive range of white kitchen splashback tiles and modern kitchen splashback tiles that meet the highest durability standards. From classic subways to textured Zellige designs, our direct-import collection ensures you get designer quality at a builder-grade price.
Don’t risk a building inspection failure or a costly measurement error. To ensure your layout is structurally sound and your tiling is perfectly calculated, Book Your Free In-Home Consultation with our expert team today.
Our technical specialists will come to your home to help you select the right modern kitchen splashback tiles, fire-rated substrates, and matching cabinet finishes for a beautiful & compliant result.